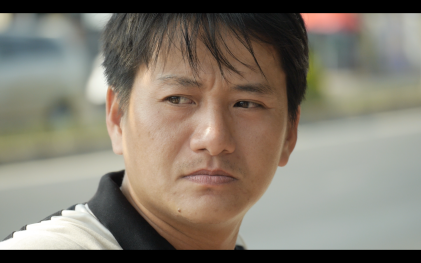
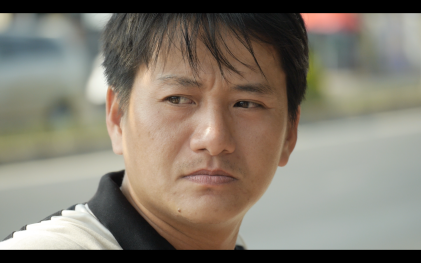
 In my last test, I hoped to show that the Lumix GH3 is fully capable of producing beautiful skin tones and satisfying bokeh, at least when coupled with the Vario 35-100mm f/2.8 lens. But because they were shot under mixed lighting, the results were perhaps not the final word. One of the reasons for doing a test at all was because of the large numbers of GH3 owners who are struggling to achieve a pleasing tonality: either by selecting Natural or Vivid profiles; lowering all the factory picture settings to -5; by applying LUTs in post; or all the above. Though I’m new to color grading, it seems to me that LUTs are not a substitute for color correction. And in spite of all the work in post, the skin tones in many of these videos still look chalky. Although there are evidently good reasons for shooting flat, some sensible GH3 users are beginning to realize that it isn’t necessary to reduce all the picture profile settings to absolute minimum simply in order to get natural tonality.
One of the advantages a hybrid camera offers compared with the small sensor of consumer camcorders is the ability to throw backgrounds out of focus; but the lack of built-in neutral density filters in mirrorless cameras, without which that advantage is negligible, means that they must be purchased separately. After months of vacillating, I finally picked up a set of Tiffen ND filters. A kit of three cost less than USD $50, or around half the price of one Tiffen Variable ND filter, itself a highly rated economical solution to shooting video in bright light. The filters enable me to enjoy the same shallow depth of field in Saigon’s intense sunshine that I’d previously only been able to squeeze out of the camera in dimly lit interiors. The kit is supplied with three values: .6, .9 and 1.2, allowing a light reduction from two to four stops. The filters come in a handy velcro storage pouch that is far more useful than some of the cheap plastic filter cases often seen at retailers. The Tiffen filters have a gratifying heft and seem more solidly built than my Hoya Pro 1 Digital UV filter. It remains to be seen whether they are as difficult to clean as the Hoya. Although I normally carry both the GH3 and the GM1, it wasn’t long before I realized the limitations of the tiny camera’s LCD in bright sunshine: the lack of an EVF is a real hindrance in such situations; so the majority of clips were made with the GH3.
Most of the shots were taken with the Vario 35-100mm lens wide open; those taken with the GM1 and 12-35mm f/2.8 lens were somewhere around f/7. As for picture profile, I used Standard, with contrast, sharpening and saturation turned down just a couple notches from the factory settings (but contrast in the GM1 must be turned down completely). In order to avoid washed-out colors, I have been using the X264 Encoder when exporting to QuickTime for uploading to YouTube. But because the videos looked dark with crushed shadows, lately I’ve been raising the midtones in FCPX seven steps, with dramatically improved results.
[Edit] I just finished watching Denver Riddle’s color correction tutorial over at Color Grading Central and realized that I’d been going about color correction the wrong way: rather than employing the RGB parade and tweaking the highlights and midtones, I’d been making adjustments with the global slider without the aid of any scopes. So from here on out, my videos should start showing some improvement. Also, Mr. Riddle’s tutorial confirmed what I already believed: that any corrections (fixing color casts and so on) should be made prior to adding the look you’re after.

Leave a Reply